Manual contents
User manual
Recording & maps
Learn to start, stop, pause, and switch views on the Main screen.
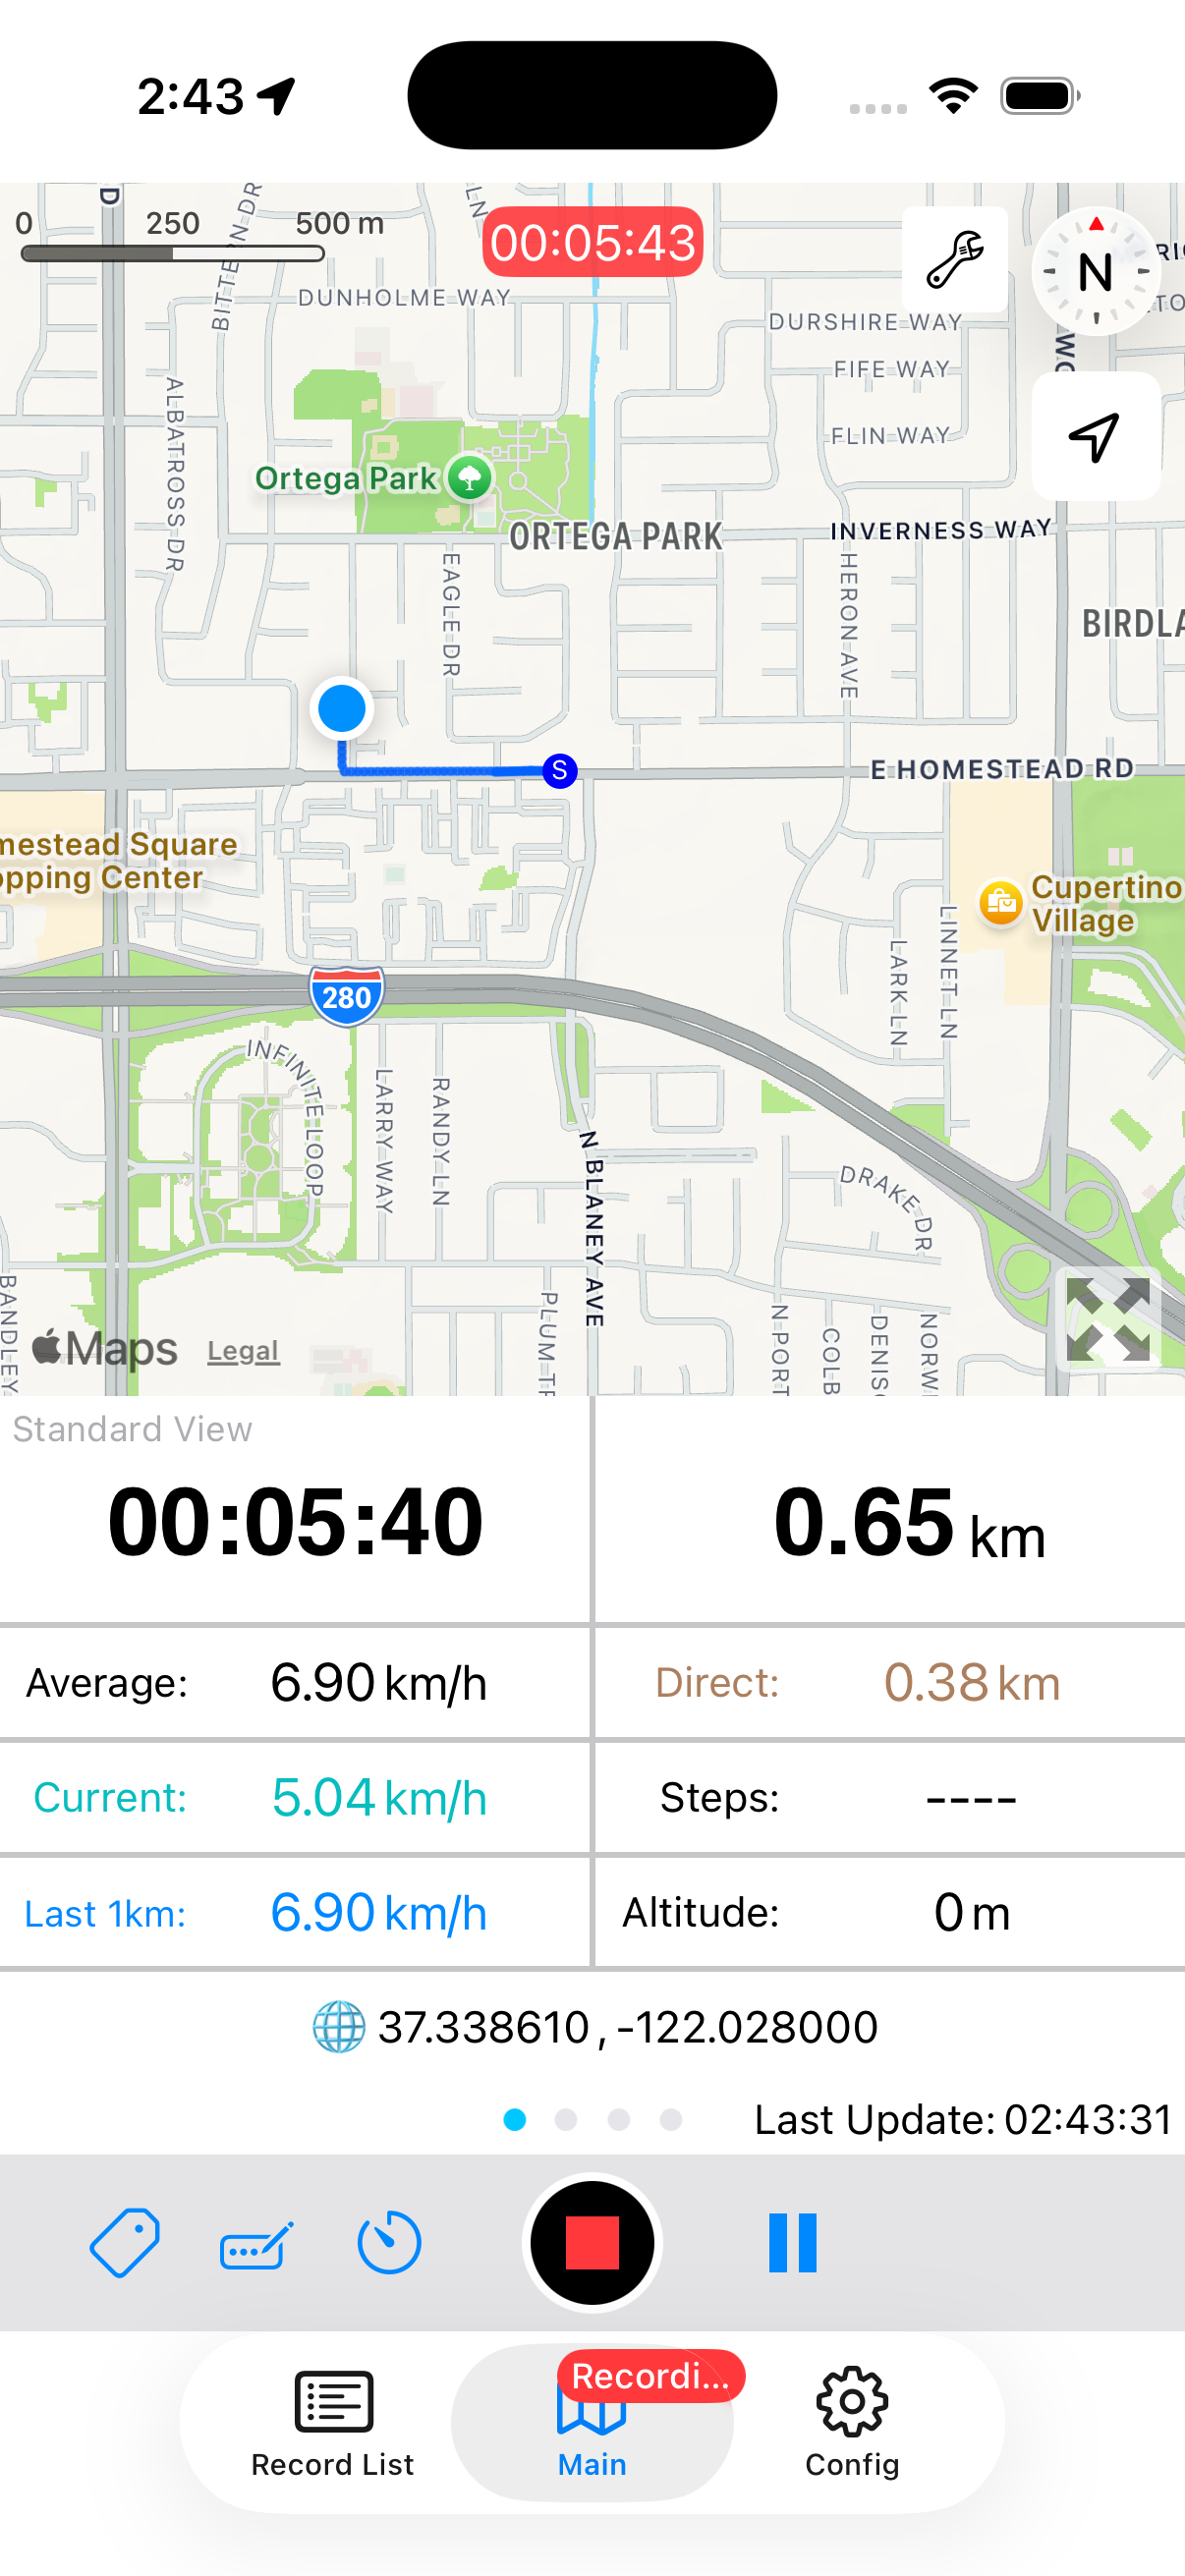
Start and stop recording
- Open Main and tap the red circle to start recording.
- Check the recording status and elapsed time before moving.
- When you arrive, tap the red square stop button.
- Confirm with OK in the recording stop dialog to save the record.
No extra action is needed to save the recording itself. Close to next resets the display for another trip; it does not delete the saved record.
WayLog cannot recreate travel before recording started. Records with no location points may not be retained.
For initial permissions and screens after stopping, see Getting started for details.
Pause and resume
While recording, tap the pause button to the right of Stop. Once the status is paused, use the button in the same place to resume.
Pausing excludes travel during the pause while keeping one record. To save a separate trip, stop the current record before starting another.
You can also resume automatically after moving a set distance. Set the default in Pause Release Distance under Config.
Change recording information and map views
Swipe the information panel below the map to switch between Standard View, Running / Walking View, Cycling View, and Driving View. Choose a view for distance, speed, pace, steps, altitude, and other information.
- Location arrow
- Change how your location is displayed and followed. Use it to return to your position after moving the map manually.
- Compass
- Shows north. Tap to orient the map with north at the top.
- Four-way arrows
- Expand the map. Tap again to return to the normal view.
Values depend on available location and other data. Step counts and activity estimates require Motion & Fitness permission.
Choose map types and overlays
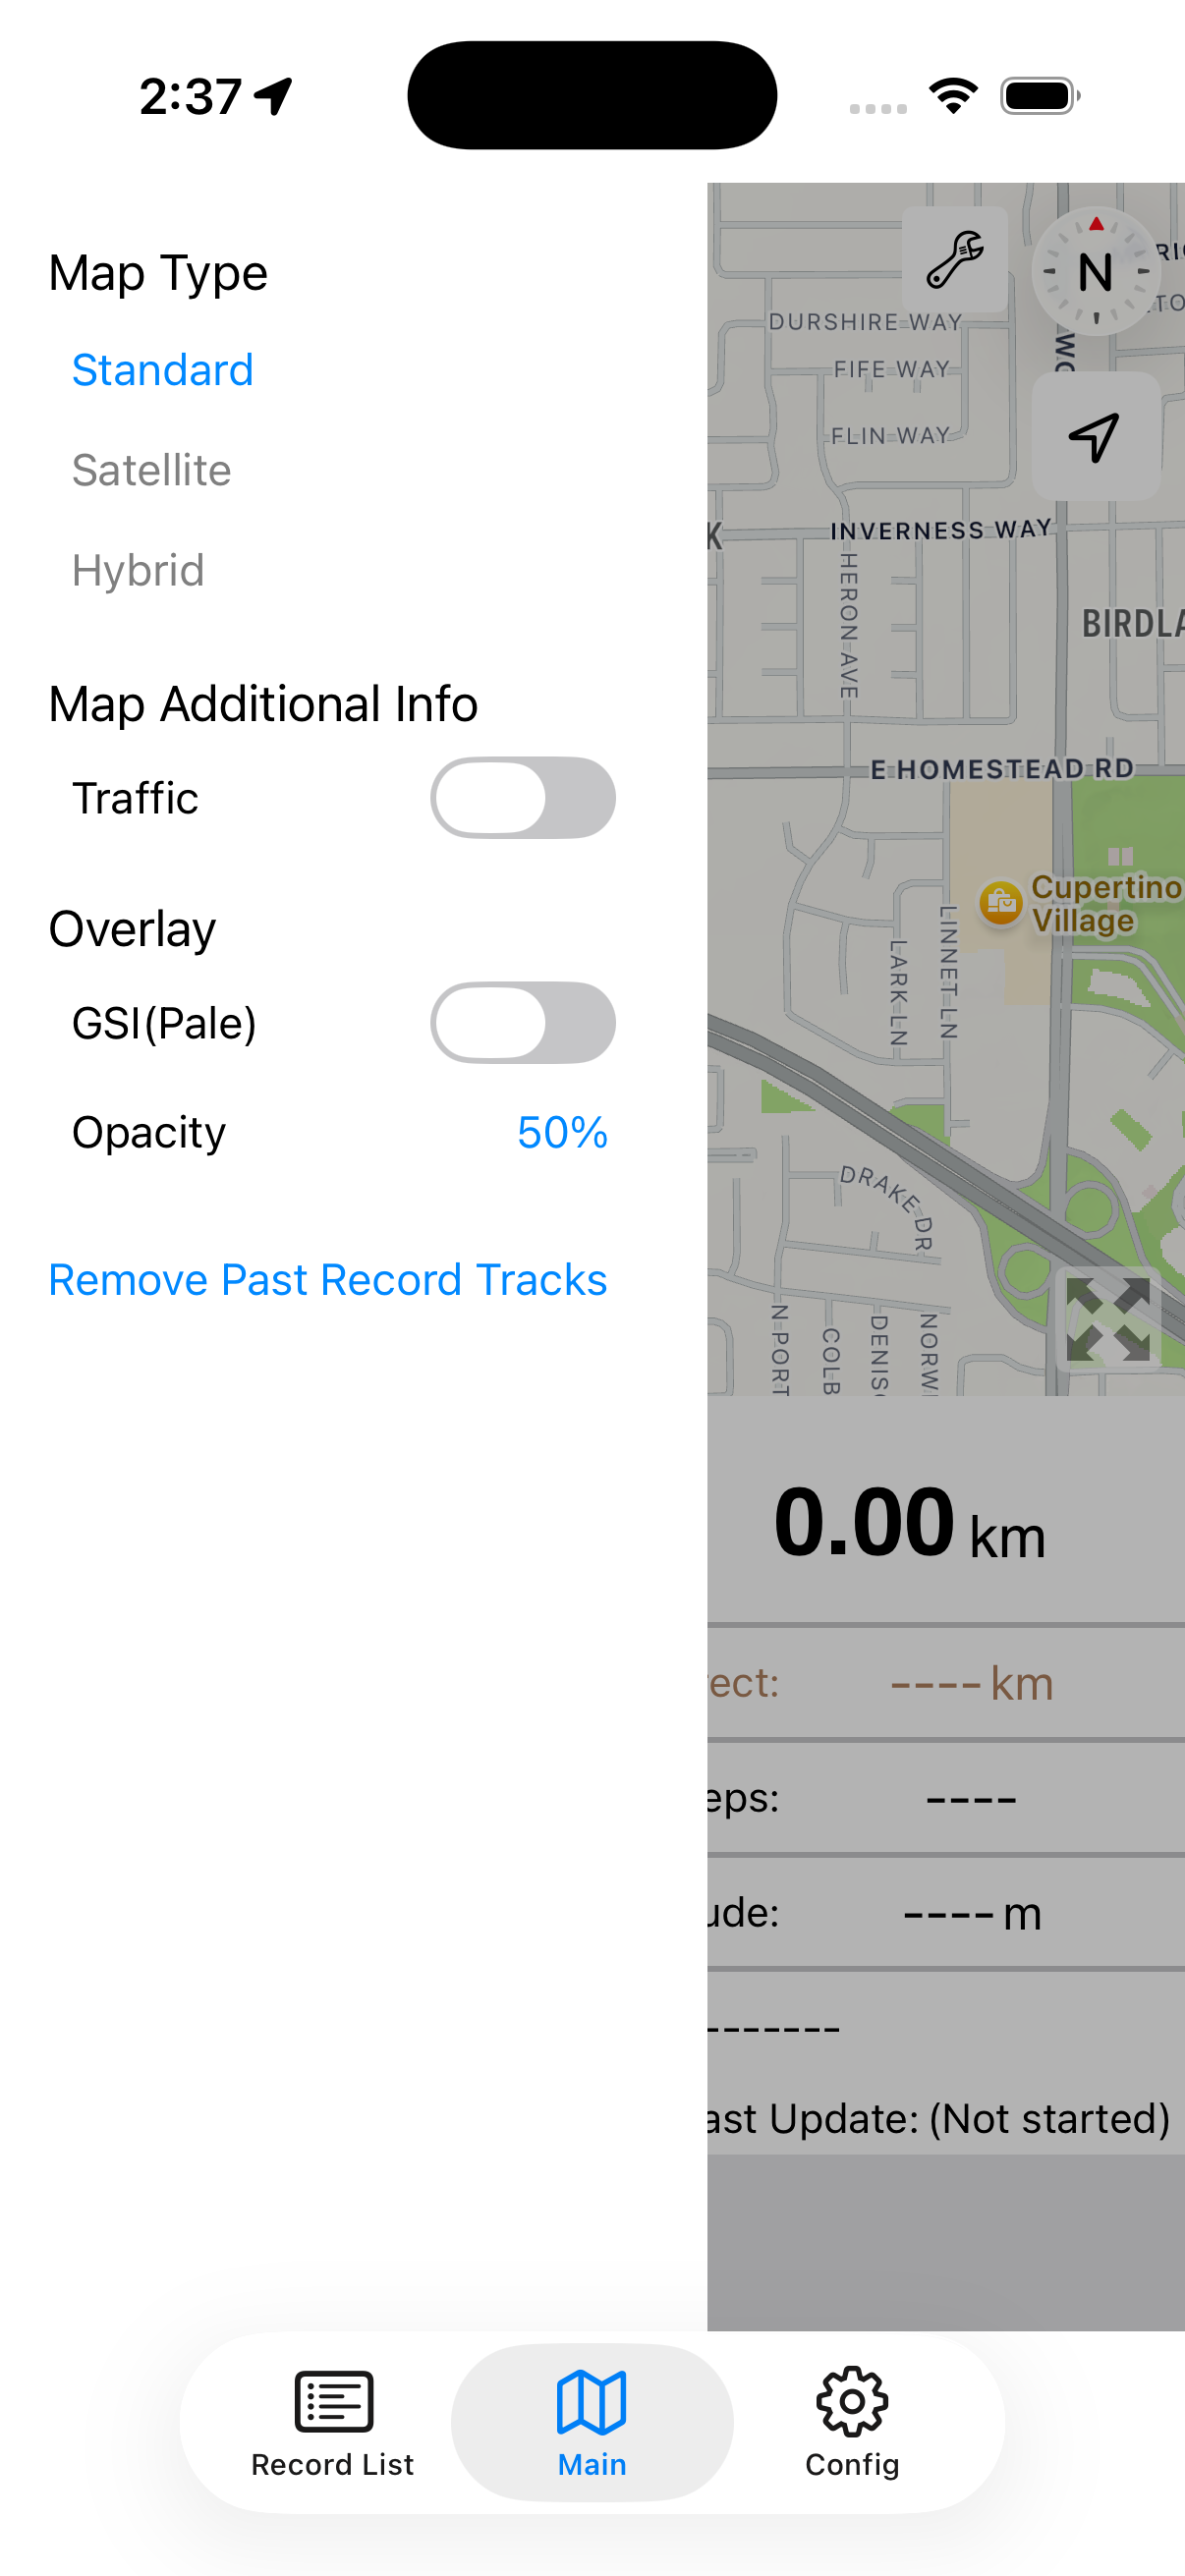
On the map, tap the wrench button to open map display settings. The same settings are available in Record Detail.
- Map type
- Choose a standard map, satellite imagery, or a hybrid view.
- Traffic
- Show or hide traffic information. Availability depends on region and data coverage.
- Japan GSI pale map
- Overlay maps from Japan's Geospatial Information Authority. This feature is for the Japan region. Adjust opacity to blend it with the map below.
- Remove past tracks
- Remove previous routes overlaid on Main. This does not delete saved records from Record List.
Use the automatic stop timer
While recording, use the timer button to choose how long until recording stops automatically. The planned stop is shown, and a cancel control removes it.
To use the same stop time for each record, set Recording Stop Timer Default in Config. It applies each time you start, so choose a value that will not stop your trip too early.
See recording information on the Lock Screen
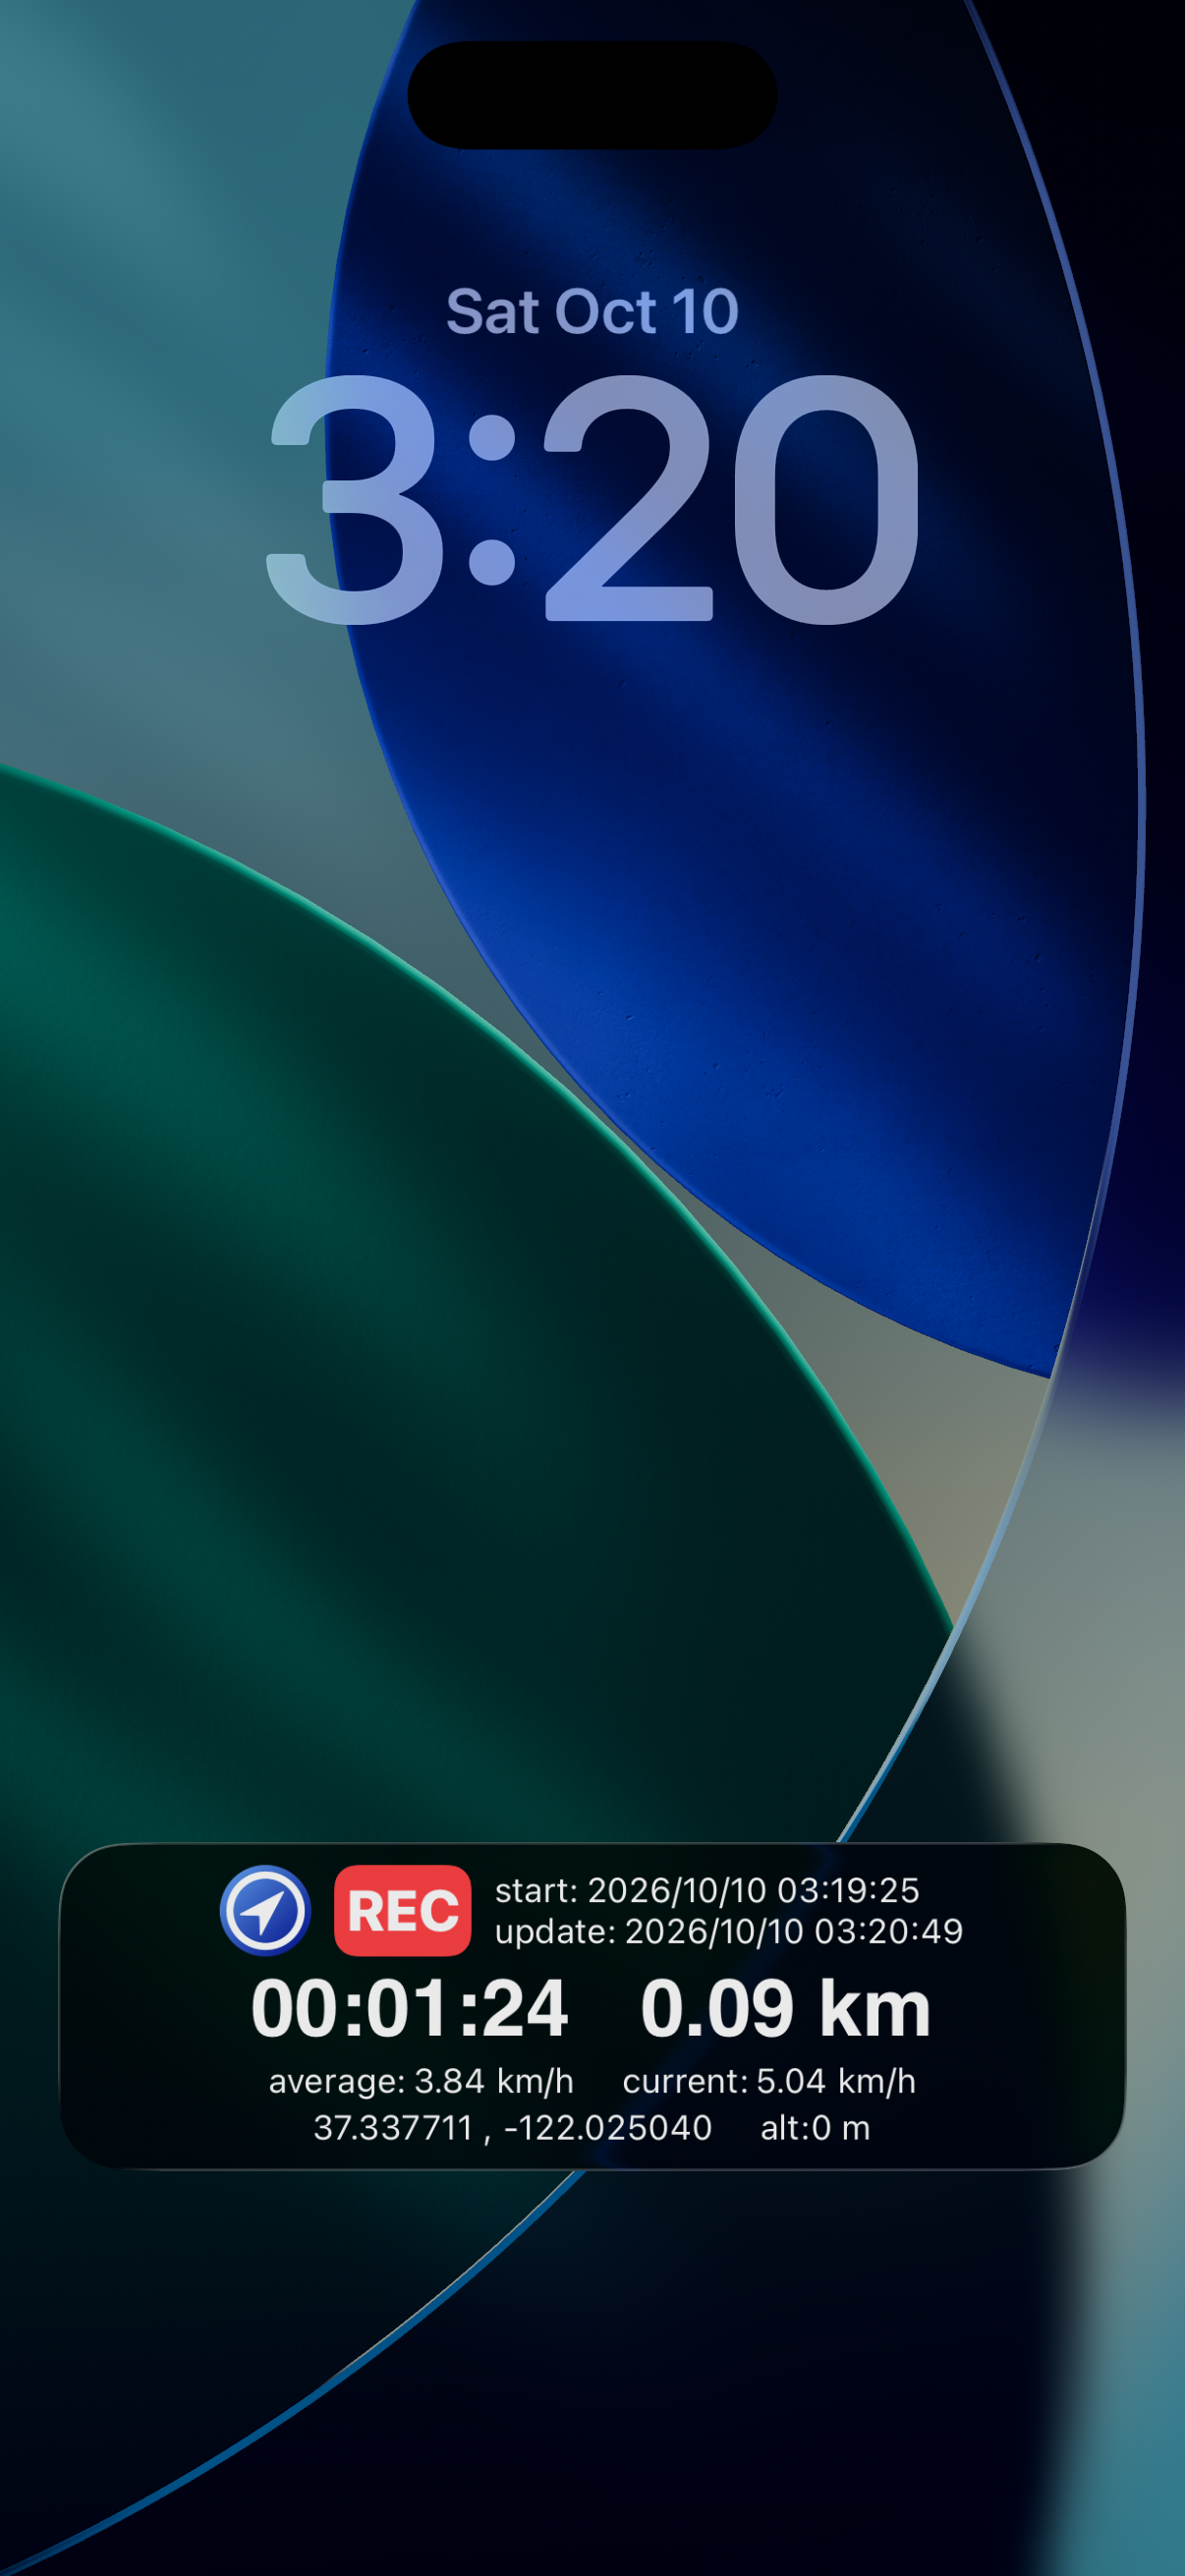
When recording starts, supported iPhones can show a Live Activity on the Lock Screen and Dynamic Island. See elapsed time, distance, speed, and other information without reopening the app.
If a permission prompt appears, review it and choose your preference. If recording information does not appear, check WayLog's Live Activities setting in iPhone Settings.
This displays information during recording. To add a way to start from the Lock Screen, add a widget separately using these instructions.
In supported environments, Live Activities can also display information in CarPlay. See the CarPlay introduction for an overview. Conditions vary with the OS and car display, so check while parked.